Pages

.

Showing posts with label Cupcakes. Show all posts

Discover Ways To Prepare Creative Home-Made Cupcakes, Desserts, Home Decorations and Fashioned Stuff

Discover new ways on preparing home and self-stuffs artistically online! Baking cupcakes, cooking delicious recipes and creating artistic home decorations and even jiving to new trends of fashion stuffs like of nail arts and hair styles can be very easy for you with the help of this site. This site will be your helpmate to do out of this world creative creation. Also, offers a step-by-step tutorial demonstration of activities. It would be very helpful for you to have varieties of creations. The LIKE IT SHORT site has its updated advertisements of new recipes and trends which will definitely help you discover and try new possessions. Moreover, this site will teach you on how to be creative, resourceful and initiative in many ways that could make complex ideas of arts from scratch.And, will lead you not to be dependent on ready-mades instead let yourself to be the one to create and design. So let's get started!

When talk about foods and desserts! Creative evolution of cooking recipes and baking cakes dominates the nation rapidly. We can see and appreciate those stuffs at parties like birthdays, weddings, anniversaries and more. Through this site, you don't need to hire caterers or even buy expensive ready-made foods and desserts for party servings;you can now make it by yourselfdeliciously and creatively. This site offers you a detailed ways on how to prepare cupcakes, healthy dishes and more from ingredients up to plating.

What about having gifts and souvenirs? There is no need to buy expensive ready-made gifts and souvenirs because you can actually have it home-made. You can now customize simple presents to make extraordinary offerings. Even a simple thing can become complex with the use of imaginative skills. Try to check out some available wedding souvenirs and birthday gifts in this site and you can have it in your most creative and convenient way. Remember that hand-made is greatly appreciable. However, following this site will teach you new ideas of inspired gifts.

How to make house a sweet home? Hmmmm...You may think that having an attractive house is expensive, you may think it wrong. Other than having luxurious furniture and decorations, make your own styles to make home utensils attractive and appreciable in to the eyes of others. Make use of old stuffs that can revamp a new one. This site has various challenging ways that will make you fun while altering the old ones.

Lastly, Be on the trend! Indeed, fashion moves rapidly. Affording the new trends every after another might be a ridiculous to have. This site will help you to have customized yet elegant bracelets, necklace, bags and other fashion stuffs. You don't need to spend more time and money to get out and buy new fashioned trends, with the available tutorials that this site offers, you can have it all.

Just follow the steps that the site offers and you'll be experiencing a simple yet creative masterpiece and feel like a master. There's no need for you to contact experts or even spend big money to be on trend. Try to check out every new updates that this site have and you'll be having a standout of arts that you never thought. It's never too late to start, so why start now? THINK, DISCOVER, FOLLOW and creativity will follow.

Lucy Handler Photo Click Here for more exciting blogs and recipes. Do not miss the chance to visit the website. You can also share it to your friends. So check it out now.
This post was made using the Auto Blogging Software from WebMagnates.org This line will not appear when posts are made after activating the software to full version.
reade more... Résuméabuiyad

Discover Ways To Prepare Creative Home-Made Cupcakes, Desserts, Home Decorations and Fashioned Stuff

Discover new ways on preparing home and self-stuffs artistically online! Baking cupcakes, cooking delicious recipes and creating artistic home decorations and even jiving to new trends of fashion stuffs like of nail arts and hair styles can be very easy for you with the help of this site. This site will be your helpmate to do out of this world creative creation. Also, offers a step-by-step tutorial demonstration of activities. It would be very helpful for you to have varieties of creations. The LIKE IT SHORT site has its updated advertisements of new recipes and trends which will definitely help you discover and try new possessions. Moreover, this site will teach you on how to be creative, resourceful and initiative in many ways that could make complex ideas of arts from scratch.And, will lead you not to be dependent on ready-mades instead let yourself to be the one to create and design. So let's get started!

When talk about foods and desserts! Creative evolution of cooking recipes and baking cakes dominates the nation rapidly. We can see and appreciate those stuffs at parties like birthdays, weddings, anniversaries and more. Through this site, you don't need to hire caterers or even buy expensive ready-made foods and desserts for party servings;you can now make it by yourselfdeliciously and creatively. This site offers you a detailed ways on how to prepare cupcakes, healthy dishes and more from ingredients up to plating.

What about having gifts and souvenirs? There is no need to buy expensive ready-made gifts and souvenirs because you can actually have it home-made. You can now customize simple presents to make extraordinary offerings. Even a simple thing can become complex with the use of imaginative skills. Try to check out some available wedding souvenirs and birthday gifts in this site and you can have it in your most creative and convenient way. Remember that hand-made is greatly appreciable. However, following this site will teach you new ideas of inspired gifts.

How to make house a sweet home? Hmmmm...You may think that having an attractive house is expensive, you may think it wrong. Other than having luxurious furniture and decorations, make your own styles to make home utensils attractive and appreciable in to the eyes of others. Make use of old stuffs that can revamp a new one. This site has various challenging ways that will make you fun while altering the old ones.

Lastly, Be on the trend! Indeed, fashion moves rapidly. Affording the new trends every after another might be a ridiculous to have. This site will help you to have customized yet elegant bracelets, necklace, bags and other fashion stuffs. You don't need to spend more time and money to get out and buy new fashioned trends, with the available tutorials that this site offers, you can have it all.

Just follow the steps that the site offers and you'll be experiencing a simple yet creative masterpiece and feel like a master. There's no need for you to contact experts or even spend big money to be on trend. Try to check out every new updates that this site have and you'll be having a standout of arts that you never thought. It's never too late to start, so why start now? THINK, DISCOVER, FOLLOW and creativity will follow.

Lucy Handler Photo Click Here for more exciting blogs and recipes. Do not miss the chance to visit the website. You can also share it to your friends. So check it out now.
This post was made using the Auto Blogging Software from WebMagnates.org This line will not appear when posts are made after activating the software to full version.
reade more... Résuméabuiyad

It's Time To Say Hello With Christmas Cupcakes

Christmas cupcakes for the occasion is a lovely sojourn with appetizing creams and caramels. It's like celebrating with taste, and making the occasion best with several cake making tips and ways. Making a snowman Christmas cupcake is all so very easy. You just need to know the ingredients required for the purpose. To give shape to the particular cake the things that you need include icing sugar, apricot jam, white marshmallows, eatable silver baubles, strawberry belts of the red candy variety, dried coconut and to add you also need to arrange for hot water.

Making of the Snowman

To prepare snowmen Christmas cupcakes, you first require heating the oven to a temperature of 180°C, 350°F. You need to fit the cake papers well on the holes, or else there can be problems when the cake starts settling down. Take a mixing bowl and start mixing sugar and butter. Beat well till the batter is light and creamy.

Then it is time for you to beat the eggs well after you have completed stirring the flour. Remember to add vanilla extracts and baking powder and continue hitting the batter until it turns absolutely smooth. After you have well applied the mixture into the cup holes, you should allow them to get baked for twenty to twenty five minutes. Once ready you would know as the cakes would rise and turn golden automatically. You can use the coconut, apricot jam and marshmallows for perfect garnishing of the snowmen Christmas cupcakes.

The Mood for Chocolate Mud Cupcakes

You can even make Christmas special with the chocolate mud cupcakes. These are even referred to as holiday cakes and to make them you require chopped butter and Lindt dark chocolate stuff. You should also arrange for instant coffee powder, coffee liquor, plain flour, cocoa powder, egg, brown sugar, hot water and chocolate curls for stupendous cake decoration. You would also necessitate preparing the chocolate ganache with Lindt dark chocolate accompanied by sour cream.

For the mud Christmas cupcakes you need to heat the oven at a temperature of 160°C. You can use one of those muffin pans with the paper cases placed in style. Take a medium sized saucepan to make a perfect amalgamation of butter, hot water, coffee liquor, coffee powder and chocolate, and stir the ingredients well over low heat. After the batter is completely smooth stop applying heat. Then it is time to add sugar after which you should leave the batter aside to cool for four to five minutes. Apply the blend over the already prepared pans and allow it to be baked for 15 to 20 minutes. The process is completed with the making of the chocolate ganache which should be spread well over the cupcakes.

The Other Exciting Cupcake Models

The ingredients for the Christmas cupcakes are more or less similar. The exceptions lie in the final garnishing. For instance, when you sit to prepare the Santa hat cupcakes, you should make use of frosted red buttercream to give shape to the hats. For an exciting Christmas tree cupcake decoration, you can even make use of festoons like star and silver balls to make the cake shine for the occasion. The kinds of Christmas holiday cakes are made to look pretty in all plausible manners. To make the cake appear different in its kind you can set to decorate with reindeers and penguins. In fact, the cupcakes meant for Christmas are the cutest stuffs to be served on the occasion.

Jacob Reed has worked as a renowned Christmas cupcakes maker for a period of time. He has some of the most wonderful holiday cake recipes in store to share.
reade more... Résuméabuiyad

Enhance The Level Of Festivity With Red Velvet Cupcakes

To make occasions memorable and to intensify the depth of festive feel, it is time that you start blending ingredients to give form to the special red velvet cupcakes. These are special yet easy to make cakes and with the perfect cheese toppings, you are made to think that Santa is on the way. The cakes would be just perfect to commemorate the onset of the Christmas month. So, it is time to feel happy with Christmas cupcakes. Yummy is the word which comes to mind when you sit to rejoice with your red velvet cupcake in hand. Just a bite will tell you the making of the desert. It is all buttering and smearing down the way.

The Things Required Shaping the Cake

Making red velvet cupcakes is not rocket science. You just have to go through the steps rightly and you would know how to make the cakes puff in time. First, it is time to make a list of the ingredients you would require for shaping the cake. You can choose to make use of two and a half cups of all-purpose flour. You can start compiling with one and a half cups of sugar, one teaspoon of baking soda, one teaspoon of salt, one teaspoon of cocoa powder, one and a half cups of vegetable oil, one cup of buttermilk at normal room temperature and two large sized eggs. You would also require two table spoons of red food coloring, one table spoon of distilled white vinegar, and a single spoon of vanilla extract.

Frosting with Cream Cheese

The red velvet cupcakes alone don't look good till they are aptly frosted with cream cheese. For the process you would require one pound of cream cheese. Before you make use of the cheese you must make sure to soften the stuff, so that it sits well over cake. You should also make arrangements for two sticks of butter, a single spoon of vanilla extract four cups of sugar preferable of the shifted confectioner variety, and to end with you can even deliver with chopped pecans. The final trimmings can be made apt with fresh strawberries and raspberries.

How to Make the Cakes

For making red velvet cupcakes you have to make use of muffin pans. It is required that you preheat the pan to a temperature of 350 degrees. You should arrange for proper cupcake papers to hold the cakes well. Take a medium sized mixing bowl and put all ingredients of flour, baking soda, sugar, cocoa powder and salt to mix well.

Take another bowl and congregate ingredients like oil, eggs, vinegar, food coloring, butter milk and vanilla. You need to amalgamate the ingredients in the correct proportion for the apt formation of the red velvet cupcakes. This is the time you must make use of an electric mixer for the proper blending of the ingredients. Mix the dry ingredients with the wet ones and the smoothening has to be done perfectly. Fill each cupcake papers with the mixture and then allow them to be heated for a time span of about 20 to 22 minutes. In the midway, you can turn the pans once and test the cakes to measure the extent of readiness of the Christmas cupcakes.

Last Tips to Follow

Be very sure to let the red velvet cupcakes be completely cooled before you start with the frosting. For preparing the frost you have to beat the cream cheese well. Butter, vanilla and sugar should be added at a low speed to combine things fine. Amalgamate well till the mixture turns fluffy. Finish with the red velvet cupcakes by providing with raspberry and strawberry toppings.

Jacob Reed is a homemaker and she has shared her experience and thrill in the making of the red velvet cupcakes . She has even received acclamation for her lips smacking Red Velvet Christmas cupcakes recipes.
reade more... Résuméabuiyad

Decorating Cupcakes For Your Party

Cupcakes!!! The very first thought of this delicious, mouth-watering dessert fills you with joy. But when it comes to attracting customers or kids, especially, you need to work on its presentation also. Merely cooking a simple cupcake is not enough; you need to decorate it also so that the eating experience is more joyous and satisfactory. And when it comes to decorating the cupcakes, there comes various decorating options.

Decorative items may include edible things as well as other packaging materials. Edible items include edible glitters and sprinklers, colours and luster sprays. Packaging and other presentation items include cupcake stands and wrapping materials, cupcake cases, carriers and boxes.

A beautiful cupcake stand not only helps you serve your guests in a better and convenient way in a party but it also adds a charm to your desert. A charming stand with a princess castle carved or printed on it will make your daughter jump high in her birthday party. The stands provide an easy, efficient and decorative way to serve the cupcakes and sweets.

The cupcake wraps are also important. A beautiful wrap going with your party theme is really worthy to spend for. You can also buy the wraps and stand that go with each other; it will give a classy look to your food corner. For instance, a cupcake stand with pink princess castle and wrap with yellow base and green dots will complement each other very well.

You may also use cupcake and muffin cases like colored foil cases to give them a vibrant extensive look. You may also buy carriers and boxes to provide your visitors with a box full of delicious and yummy cupcakes as a return gift. There are several designer boxes available in the market for the same. You may decorate these boxes further with florist tapes or metallic flower wires to give them a more attractive look.

Concentrating a bit on this decorating section is really worthy to spend your time and money for. Moreover, these decorative items don't come so expensive; some sellers provide these stands, wraps and cases at a really reasonable rate and that too with a variety of designs' options. There are various e-commerce websites on which you may search and select the best and cheapest item according to your need.

A party is incomplete without dessert, especially cupcake and these cupcakes are incomplete without their decoration. So you should also give importance and spend some of your resources to this side also.

Author is a professional writer as she is writing articles on various topics from last three years. With this post she wants to share information on decorative cupcake stands .
reade more... Résuméabuiyad

Recipe: Strawberry Cupcakes


We love celebrating birthdays in our house.  My girls especially like to celebrate their teacher's birthdays so when one of our teachers had a birthday last month, I made some strawberry cupcakes.  I have seen several blogs that have made these adorable roses on cakes and cupcakes.  They appeared to be so daunting, but after looking at this blog, I realized I was being a big baby and they were really easy.  

I could have also gone the easy route and made the cupcakes from a box mix, but I wanted up my game. I used this recipe that I found on the blog, Apron of Grace, that I had pinned a while back and I am so glad that I found it.  It is a bit more work than just throwing it together from the box, but it is worth it.  I actually had a small bag of frozen strawberries that I put in a saucepan and reduced down to a thick yummy juice.  I smashed the strawberries with a fork and left them a bit on the chunky side.  I also decided to skip adding the red food coloring which made by cupcakes a pale pink, which I loved.  If you want a bright pink, then add the red food coloring.

I made enough cupcakes for all the teachers and students in the third grade.  My kids loved the cupcakes and I was so glad that I tried something new.  I will be decorating all kinds of cupcakes and cakes with this new rose technique.  I think a beautiful cake decorated with all roses for Mother's Day would be so beautiful.

Enjoy!


Strawberry Cupcakes
{original recipe by Apron of Grace}
Ingredients
    For the Cupcakes
    • 1 cup butter, room temperature
    • 2 1/2 cups sugar
    • 2 egg yolks
    • 5 egg whites
    • 1 tsp vanilla extract
    • 1 tsp red food coloring
    • 1 1/4 cups pureed strawberries
    • 3 cups cake flour, sifted
    • 1 tsp baking powder
    • 1 tsp baking soda
    • pinch salt
    • 1 cup buttermilk

    For the Frosting
    • 1 - 8oz pkg cream cheese, room temperature
    • 1/2 cup butter, room temperature
    • 1/3 cup half and half/whipping cream
    • 1 tsp vanilla
    • 1 tsp red food coloring
    • 1 lb. powdered sugar

    Instructions

    For the Cupcakes
    1. Preheat oven to 350 degrees.
    2. Line cupcake tin with liners.
    3. In a medium bowl, beat butter with sugar for 3 minutes.
    4. Add egg yolks one at a time, then the vanilla, food coloring and strawberries, beat for another 3 minutes.
    5. Sift dry ingredients and add to butter/egg mixture alternately with buttermilk, beginning and ending with the dry ingredients., mixing just till combined.
    6. In another bowl and clean beaters, beat egg whites till stiff and add in an increment of 3 to cake batter, being sure to fold in thoroughly but gently.
    7. Bake for 12 to 18 minutes for cupcakes and 20-25 minutes for 9 inch round cake pans.
    8. Remove from oven and allow to cool completely before frosting.
    For the Frosting
    1. In a medium bowl, add cream cheese and butter, whip till light and creamy, about 3 minutes.
    2. Add liquids and blend.
    3. Slowly add powdered sugar while mixing.
    4. At this point you may need to add more powdered sugar. You are trying to achieve a medium stiff consistency. Whip for several minutes.
    To Make the Roses
    1. Using a 1M tip, fill the pastry bag with frosting. 
    2. To make your rose, start in the center, then slowly move your tip in a circle around the center point.
    Powered by Recipage


    Linked To:
    *My Sweet and Savory: My Meatless Monday
    *The Southern Institute: Creative Me Link Up
    *Boogieboard Cottage: Masterpiece Monday
    *Mrs. Happy Homemaker: Makin' You Crave Monday
    *11th Heaven's Homemaker Monday: Homemaker Monday
    *The Sweet Spot: Recipe Party Time
    *Talking Dollar and Cents: Muffin Monday
    *DIY Home Sweet Home: More the Merrier
    *Make Ahead Meals for Busy Moms: Melt in Your Mouth Monday
    *Flour Me with Love: Mix It Up Monday
    *Delightfully Dowling: Mangia Monday
    *A Southern Fairytale: Mouthwatering Monday
    *Marvelously Messy: A Marvelous Mess
    *Sumo's Sweet Stuff: Market Yourself Monday
    *Skip To My Lou: Made By You Monday
    *Blessed with Grace: Tempt My Tummy Tuesday
    *It's A Blog Party: Delicious Dishes
    *Mandy's Recipe Box: Totally Tasty Tuesday
    *Hoosier Homemade: Cupcake Tuesday
    *33 Shades of Green: Tasty Tuesday
    *Permanent Posies: Tuesday's Tasty Tidbits
    *Reasons to Skip the Housework:  Tuesday Time Out
    *Chef in Training: Tuesday Talent Show
    *BruCrew Life: Treak or Treat Tuesday
    *From Mess Hall to Bistro: Made From Scratch Tuesday
    *Sweetology: Tea Party Tuesday
    *Crazy for Crust: Crazy Sweet Tuesday
    *Two Maids a Milking: 2 Maids a Baking
    *Bizzy Bakes: Bake with Bizzy
    *Talking Dollar and Cents: Sweet Tempations
    *Miz Helen's Country Cottage: Full Plate Thursday
    *A Little Nosh: Tastetastic Thursday
    *Something Swanky: Sweet Treat Friday
    *Alli-n-Sons: Sweet Tooth Friday
    *Food Corner: Decorating Challenge

    reade more... Résuméabuiyad

    Countdown to 2012: Best Desserts

     Countdown to 2011 with Finding Joy in My Kitchen


    I am so excited to be joining SnoWhite at Finding Joy in My Kitchen for her annual countdown.  I participated last year and it was interesting to look back on my blog to see the recipes that I made over the past year.

    I love to bake!  I didn't get to bake as much as I like to this year with the very long heat wave that we went through here in Texas.  It was just too hot to turn the oven on unless I had to.  However, I did manage to make some desserts that my family and friends loved.  Here were our favorites:


    reade more... Résuméabuiyad

    Recipe: Blue Velvet Cupcakes with Cream Cheese Frosting


    This year, my daughter decided she didn't want pink cupcakes to celebrate her birthday with her classmates.  She wanted blue and white (our school colors) cupcakes to celebrate our varsity girl volleyball team that went to the state championship and come home ranked third in our great big state of Texas.  Go Lady Cougars! 

    Well, I aim to please my baby girl but I had planned on making white cupcakes with pretty pink frosting.  I turned to the internet in search of blue velvet cupcakes and found several recipes.  A couple of recipes I found weren't exactly blue but a shade of green with a blue tint.   I came across a couple more that were very vibrant and a beautiful shade of blue, but I didn't have the right food coloring gel to make those cupcakes.  I also couldn't just run right out and pick up the needed colors because I am 45 minutes away from the nearest big store and my little country grocery store doesn't carry things like food coloring gel.  So, I searched through the gels that I had and this is what I came up with.  They were a deep dark blue which was perfect for our team color and thank goodness not a shade of green in them.  Best of all my daughter loved them! 

    These really aren't traditional blue velvet cupcakes because I used a box cake mix and added coloring.  A traditional velvet cake is made from scratch with buttermilk.  At some point, I would like to make a traditional velvet cake, be it red, blue or green, but for now I am completely happy with the results I achieved with my shortcut.

    Enjoy!


    Blue Velvet Cupcakes with 
      Cream Cheese Frosting
    (recipe by Wende Rickett/The Rickett Chronicles)

    Cupcakes
    Ingredients
    1 box white cake mix with ingredients as listed on the box
    1 tbsp cocoa powder
    2 tsp cornflower blue food coloring gel
    15 drops of blue food coloring (the liquid kind you dye your Easter eggs with)
    1 smidgen of red food coloring gel

    Directions
    Preheat oven to 350 degrees.  Line muffin pans with liners.  In a large bowl, following the cake mix instructions, add ingredients for cake and mix.  In a small bowl, add cocoa powder and food colorings, mixing to make a paste.  Add paste to cake mix bowl and mix until very well blended.  Scoop the batter into the cupcake liners filling about 2/3 of the way up.  Bake for 15 to 18 minutes or until done.  Allow to cool completely before frosting.

    Cream Cheese Frosting
    Ingredients
    1 8-oz package cream cheese, room temperature
    1/2 cup butter
    1/2 tsp vanilla
    pinch of salt
    4 to 5 cups powdered sugar, depending on the consistency you need
    1 to 2 tbsp half and half (or milk), if needed

    Directions
    Mix cream cheese, butter and vanilla until well mixed and smooth.  Add a pinch of salt and mix.  Add two cups powdered sugar to cream cheese mixture and beat until smooth and incorporated.  Add one cup of the remaining powdered sugar at a time until the desired consistency is achieved.  If it gets to thick, you can add a little half and half to thin it out a bit.  Put frosting in a bag and pipe onto cupcakes.


    Linked To:
    *Frugal Antics of a Harried Homemaker: Your Recipe, My Kitchen
    *Make Ahead Meals for Busy Moms: Melt in you Mouth Monday
    *Boogieboard Cottage: Masterpiece Monday
    *11th Heaven's Homemaker Haven: Homemaker Monday
    *Talking Dollar and Cents: Muffin Monday 
    *DIY Home Sweet Home: More the Merrier Monday
    *Delightfully Dowling: Mangia Monday
    *A Southern Fairytale: Mouthwatering Monday 
    *Marvelously Messy: Marvelous Mess 
    *Sumo's Sweet Stuff: Market Yourself Monday
    *The Girl Creative: Just Something I Whipped Up
    *Skip to My Lou: Made by you Monday
    *Project Queen: Turing the Daunting Into the Doable
    *Blessed with Grace: Tempt My Tummy Tuesday
    *All the Small Stuff: Tuesdays at the Table
    *Hoosier Homemade: Cupcake Tuesday
    *33 Shades of Green: Tasty Tuesdays 
    *Chef in Training: Tuesday Talent Show
    *Permanent Posies: Tuesday Tasty Tidbits 
    *Reasons To Skip the Housework: Tuesday Timeout 
    *My Sweet and Savory: Let's Do Brunch 
    *Bizzy Bakes: Bake with Bizzy  
    *Sweetology: Tea Party Tuesday
    *This Chick Cooks: These Chicks Cooked 
    *Stuff and Nonsense: Friday's Unfolded 
    *Designs by Gollum: Foodie Friday 
    *Miz Helen's Country Cottage: Full Plate Thursday
    *Talking Dollar and Cents: Sweet Tempations 
    *Somewhat Simple: Strut Your Stuff
    *What Allie's Making Now: Making It With Allie
    *A Glimpse Inside: Catch a Glimpse 
    *A Creative Princess: It's a Party!
    *Ali n'Son: Sweet Tooth Friday
    *Bacon Time with the Hungry Hungry Hippo: Anything Goes
    *EKat's Kitchen: Friday Potluck  
    *Six Sisters' Stuff: Strut Your Stuff Saturday
    *Sweet as Sugar Cookies: Sweets for a Saturday 
    *Be Different, Act Normal: Show and Tell Saturday 
    *Nifty Thrifty Things: Nifty Thrifty Sunday 
    *A Well-Seasoned Life: Sweet Indulgence 
    *LambAround: Not Baad Sunday 
    *J&M's Eye Candy: Strut Your Stuff 
    *Petite Hermine: Sunday Linky Party 


    reade more... Résuméabuiyad

    Recipe Review: Cherry Limeade Cupcakes


    Yum...cherry limeade drinks from Sonic are my favorite drink treat.  So, when I came across this recipe from It's the Life blog, I knew that I had to try it.  I signed up to feed the volunteers at Vacation Bible School and wanted to make something pretty and tasty.  These were perfect.  Not only are they pretty to look at but they taste so good!  The cupcakes were gone in no time and I received lots of compliments.  I will be making these again for an upcoming family reunion but will probably double the recipe because they were so awesome.  I will also use stemmed cherries as well....I think they will look prettier.

    Enjoy!

    Cherry Limeade Cupcakes
    (original recipe by It's the Life)

    Cupcakes
    1 box white cake mix (and all ingredients needed to make the cake)
    1 jar maraschino cherries (with or without stems)
    1 cup powdered sugar
    2 limes

    Buttercream Frosting
    1 bag powdered sugar
    2 sticks butter, room temperature
    1 lime
    milk

    To make the cupcakes, preheat oven and make the batter according to the package directions.  Add 3 to 4 tablespoons of the cherry liquid into the batter.  You could chop some of the cherries and add to the batter, but I wanted a smooth cupcake.  While the cupcakes are baking, make a lime glaze by mixing the juice of two limes with one cup of powdered sugar.  Once the cupcakes are removed from the oven, poke several (I did at least 10 to 12) holes with a toothpick in each cupcake.  With a spoon, slowly spoon the glaze on each cupcake, using the back of the spoon to spread it out covering each hole.  Allow the cupcakes to sit a few minutes and repeat the glazing.  Loosely cover cupcakes and refrigerate for a few hours.  While the cupcakes are cooling, drain the cherries and rinse them thoroughly.  Drain them on paper towels for a few hours.  (This step will ensure that the cherries don't bleed in your beautiful white frosting.)

    To make the frosting, beat the softened butter until fluffy.  Slowly add the powdered sugar, beating to ensure there are no lumps.  I used all but about a cup of powdered sugar because I like a stiffer frosting.  I had some leftover glaze, so I also added this along with the juice of one lime.  Add a little milk, if needed, to thin it out a bit.  Frost as you normally would.  Add the dried cherry to top of each cupcake.

    Linked To:
    *Lamb Around: Not Baad Sundays
    *The Girl Creative: Just Something I Whipped Up
    *Boogieboard Cottage: Masterpiece Monday
    *11th Heaven's Homemaking Heaven: Homemaker Monday 
    *Two Maids a Milking: Two Maids a Baking
    *Sumo's Sweet Stuff: Market Yourself Monday
    *Frugal Antics of a Harried Homemaker: Your Recipe, My Kitchen
    *A Southern Fairytale: Mouthwatering Monday 
    *Blessed with Grace: Tempt My Tummy Tuesday 
    *Dr. Laura's Adventures: Tasty Tuesday
    *Mandy's Recipe Box: Totally Tasty Tuesday 
    *From Mess Hall to Bistro: Made From Scratch Tuesday 
    *Lady Behind the Curtain: Cast Party Wednesday
    *It's a Keeper: It's a Keeper Thursday
    *Sweet as Sugar Cookies: Sweets for Saturday
    *Everyday Sisters: Sharing Sundays 
    *Hoosier Homemade: Cupcake Tuesday


    reade more... Résuméabuiyad

    Recipe Review: Tagalong Cupcakes


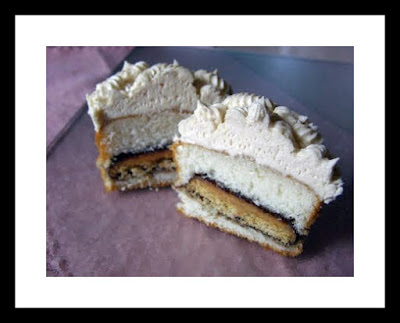
    I have been wanting to make these cupcakes for months.  This recipe comes from one of my favorite blogs, InsideBruCrew Life.  She has the most awesome recipes!  I saved back a box of Tagalongs with this recipe in mind.  Boy, I am so glad I did!  These were so so very good and my family has eaten them up.  I love the fact that they are made with a box cake mix...saved me some time.  If you have a box of Tagalongs stashed away somewhere, you must give these a try!

    Enjoy!


    Tagalong Cupcakes

    1 vanilla cake mix 
    Tagalong Cookies (from your favorite Girl Scout)

    Preheat oven to 350* Place liners in cupcake pan. Make up the cake mix according to the directions. Put 2 tablespoons of batter in each liner. Set a cookie on top of the batter in each liner and then finish filling the liner with batter. Fill it at least 3/4 of the way full. Bake 22-24 minutes. Let cool. Frost with Honey Peanut Butter Cream. Add sprinkles and eat!

    Honey Peanut Butter Cream
    1 cup butter, softened
    1/2 cup peanut butter
    2 tbsp water
    2-4 tbsp honey
    1 tsp vanilla
    1/8 tsp salt
    4 cup powdered sugar

    Cream butter and peanut butter. Add the water, salt and vanilla and cream again. Slowly add the powdered sugar. After all the sugar is added, beat in another 1-2 tbsp water. Then beat in the honey until creamy. 


    Photobucket
    reade more... Résuméabuiyad

    Gifts From My Kitchen: Peppermint Fudge Cupcake Jars


    Right before the holidays, I was reading through one my absolute favorite blogs, Our Best Bites, looking for teacher's gifts to make and came across this...cupcakes in a jar!  I know right?  Can you believe it?  How stinkin' cute are they and so different?  And really very easy.  They were a hit.  Not only did they taste good but they were so pretty.  While these were made for Christmas, why not for Valentine's?  I could not find the wide mouth jars anywhere in my town, so I used what I had on hand, the regular size jars.  I didn't have any problems with the size difference.  I was able to find Andes candy in red and white bits that was perfect as a topping.

    I made the decorating simple.  I covered the top of the jar with the lid and put a cupcake liner upside down and flattened the bottom of the liner and then screwed the ring over the liner.  Instant and easy! 

    You really REALLY need to give these a try.  Perhaps for your Valentine!

    Enjoy!


    Peppermint Fudge Cupcake Jars
    (recipe from Our Best Bites)
    Makes approximately 8 jars or 12 Cupcakes

    Cupcakes (cake base for this dessert adapted from Shelly Kaldunski)
    2/3 cup all-purpose flour
    2 1/2 tbsp unsweetened cocoa powder
    3/4 tsp baking powder
    1/4 tsp salt
    3 oz chocolate, chopped. (or abt 1/2 C chips) Use bittersweet, dark, or semi-sweet.
    1/2 C + 3 tbsp real butter, cut into pieces
    3/4 C plus 2 tbsp sugar
    3 large eggs, at room temperature
    1 tsp vanilla extract

    8 8oz wide mouth mason jars (or regular if you can't find wide mouth)

    Preheat oven to 350 degrees. Place the chocolate and butter in a large heatproof bowl and microwave in 30 second intervals, stirring after each, until melted and smooth. Set mixture aside and let cool 10-15 minutes. In a separate bowl, whisk together the flour, cocoa powder, baking powder and salt. Using a wooden spoon (don't use an electric mixer) stir the sugar into the chocolate mixture until combined. Stir in the eggs one and a time, beating with your spoon until combined after each addition, and then beat in the vanilla. Gently fold in the flour mixture just until no traces of flour remain; do not over mix.

    Place the mason jars on a cookie sheet. Divide the mixture evenly among the 8 jars (no need for greasing the jars) or 12 cupcake liners if you're going that route. The jars should be about half full or a little less. Bake until a toothpick inserted into the center of the jar comes out with only a few moist crumbs attached 22-25 minutes. Remove from oven and carefully (with a pot-holder!) transfer jars to a cooling rack. Let jars cool till at least close to room temperature before topping with ganache.


    Peppermint Ganache
    4 oz semi-sweet chocolate (chocolate chips are fine)
    1/2 C heavy cream
    1/4 tsp peppermint extract

    Place chocolate chips in a bowl. Heat cream in microwave until bubbles form around the outside. Pour in bowl over chocolate chips and immediately cover bowl with plastic wrap. Let sit for 5 minutes, add peppermint extract and then whisk until smooth. Let cool uncovered until thickened slightly, almost like a thin pudding.

    To assemble, pour 1 1/2-2 Tbs ganache over the top of each cupcake jar. If desired, use a paring knife to first hollow out a well in the middle of the cake. Tilt jars to distribute ganache evenly over the top of the cake and then let cool for the ganache to set. If storing overnight, place lids and rings on jars and leave at room temperature.

    Frosting
    3 tbsp flour

    1/2 cup milk (whole milk is best)
    1/2 cup real butter
    1/2 cup sugar (that's granulated sugar, not powdered sugar)
    1 t vanilla extract
    1/2 tsp peppermint extract

    Whisk together the flour and the milk. Heat in a small sauce pan on medium heat. Whisk continuously until it starts to thicken. Let it cook, while stirring, until you can start to see the bottom of the pan. It should still be liquid-ish.  It's okay if you have lumps, because we're gonna strain those out right now. Place the mixture in a mesh strainer and stir with a rubber spatula to push it through. You should end up with a nice, smooth mixture. It's almost like pudding before it's set.

    Put this mixture in the fridge and let it cool completely, it's fine if it stays in there long enough to get chilly, you just don't want it warm at all. When it is chilled, you can move on to the following step.

    In an electric stand mixer, beat the butter and the sugar for a minute or two until well combined and fluffy. You'll want to use the whisk attachment on a stand mixer, not the flat paddle. Then while beating, add in the thickened
    milk mixture and the vanilla. Beat to combine and then scrape down the sides. Don't be scared. It's going to look like a goopy mess and kind of lumpy and separated.  Beat on med-high for 7-8 minutes. After 7-8 minutes it will have transformed from that sloppy mess into something gorgeous, fluffy, and incredibly light and silky.

    (See instructions on the Our Best Bites blog for creating a red and white striped look.) Pipe frosting on each jar, being careful to leave room for the lid. If desired, sprinkle on some crushed candy canes or candies and then screw on jar lids.


    Linked To:
      * Blessed with Grace:  Tempt My Tummy Tuesday
      * It's A Blog Party:  Delicious Dishes
      * A Beautiful Mess:  Wordless Wednesday
      * All the Small Stuff:  Tuesdays at the Table
      * Not So Homemade:  What's Cooking Wednesday
      * From my tiny kitchen:  Gold Star Wednesday
      * We are THAT Family:  Works for me Wednesday
      * Simply Sweet Home:  Friday Favorites
      * Prairie Story:  Recipe Swap Thursday
      * Mommy's Kitchen:  Potluck Sunday
      * Sister Sister Sunday
      * Miz Helen's Country Cottage:  Full Plate Thursday
      * It's A Hodgepodge Life:  Hodgepodge Friday
      * Alli-n-son:  Sweet Tooth Friday


    Photobucket
    reade more... Résuméabuiyad

    Countdown to 2011: Desserts

    Okay, so I am a day late in this post but I wanted to share some of the desserts I made over the past year.  I am joining Finding Joy in My Kitchen's countdown. 

    Here is some of the delightful goodness we enjoyed!


    ~~~~


    ~~~~


    ~~~~


    ~~~~


    ~~~~


    ~~~~


    ~~~~


    ~~~~


    ~~~~


    ~~~~


    ~~~~

    reade more... Résuméabuiyad