Pages

.

Showing posts with label Lunch Box. Show all posts

Back to School: Bento Boxes/Lunches


We are about three weeks away from the start of school and that has me in back to school prepping mode.  One out of three of my children is ready for school to start.  My oldest daughter LOVES school and like me, she loves to walk down the aisles filled with school supplies.  I love the smell of new pencils, paper, folders....I know....completely weird.

Last school year, I started working at my children's school the last three months.  During those months, my children ate school lunches, not my proudest mommy moment.  I have been at home with my kids for eight years so going back to work got us out of our normal routines and we were just trying to make it through the end of the school year.  I am returning to work at the school, but this year, I am planning on making their lunches.

I have been pinning, reading blogs and trying new recipes to make packing lunches easier.  I have found some super looking recipes and ideas.  I don't know about you, but I am fascinated with bento boxes.  Some look very time consuming but I have a found a few that could possible be a quick alternative. I also am sharing some of our family favorites that my kids love to have for lunch.


Family Favorites
Quick and Healthy Homemade Potato Chips

~~~~
Herb Cream Cheese Stuffed Pitas

~~~~
Mac and Cheese Cupcakes

~~~~
Homemade Yogurt

~~~~
Oh So Tasty Bean Salad

~~~~

New Recipes to Try

Mini Ham & Cheese Quinoa Cups

~~~~
Pizzas in a Sleeping Bag

~~~~
Roast Beef and Cheddar Rollups

~~~~
Cheddar and Apple Sandwich

~~~~
Chicken Potpie Empandas

~~~~
Mini Corn Dog Muffins

~~~~
Peanut Butter and Jelly Sushi

~~~~
Chick-fil-A Bites with Honey Mustard Sauce

~~~~
Cucumber Feta Rolls

~~~~
Broccoli Cheese Bites

~~~~
Bento Boxes
Ladybug Bento Box
Source: google.de via Wende on Pinterest

~~~~
Pizzette Bento

~~~~
Monkey Lunch

~~~~
Flowery Bento Box

~~~~
Angry Birds Bento Box
Source: google.de via Wende on Pinterest

~~~~
Chicken Dunk Lunchables


Linked to:


reade more... Résuméabuiyad

Recipe: Biscoff Stuffed White Chocolate Chip Cookies


Have you heard about Biscoff Spread or have I been completely living out in the middle of nowhere....oh...wait....I do!  I have seen a couple of recipes over the past few months that have Biscoff as one of the ingredients.  They certainly don't see something as exotic as that in my little country grocery store but one day when I was in a bigger city I happened to find it at Walmart.  Yes, that fancy store.  And, I am so glad that I did find it.  It is amazing.  I mean really A-MAZE-ING!


So, as I was looking through my favorite blogs trying to decide what I would make with this awesome stuff, I came across this recipe on Picky Palate's blog.  These cookies were so good that I had to share them with the teachers at our school and they got rave reviews.  They are like over the top good!  These are not delicate petite cookies, they are stuff your face big delightful goodness.  They are so good that I making them again tomorrow!


Enjoy!


Biscoff Stuffed White Chocolate Chip Cookies
{original recipe by Jenny/Picky Palate}
Ingredients
  • 2 sticks unsalted butter, softened
  • 1 cup sugar
  • 1 cup brown sugar, packed
  • 2 eggs
  • 1 tbsp vanilla
  • 4 cups AP flour
  • 1 tsp baking soda
  • 1 tsp salt
  • 2 1/2 cups white chocolate chips
  • 2 cups Biscoff Spread (I used crunchy)
Instructions
  1. Preheat oven to 350 degrees.
  2. Line a large baking sheet with a silpat liner or parchment paper.
  3. In a stand or electric mixer, beat butter and sugars until well combined.
  4. Add eggs and vanilla beating until well combined.
  5. Place flour, baking soda and salt into a large mixing bowl. Stir to combine.
  6. Slowly add to the wet ingredients along with white chips until just combined.
  7. With a medium cookie scoop, scoop the dough onto the prepared baking sheet about 1 inch apart.
  8. Using your thumb, press a well into each cookie for the Biscoff.
  9. Using a small spoon, scoop about 1 tablespoon Biscoff into each well of the cookie.
  10. Place another scoop of cookie dough on top and press edges gently. The Biscoff will not be completely enclosed and will be visible around edges.
  11. Bake for 12-15 minutes, until edges are just golden brown.
  12. Let cool for 10 minutes on the baking sheet then transfer to a cooling rack to cool completely.

Get ready to have your socks knocked off!
Powered by Recipage


Linked To:
*The Southern Institute: Creative Me 
*Mrs Happy Homemaker: Makin' You Crave Monday
*Make Ahead Meals for Busy Moms: Melt in Your Mouth Monday
*My Sweet and Savory:  My Meatless Monday
*Boogieboard Cottage: Masterpiece Monday
*Blessed with Grace: Tempt My Tummy Tuesday
*It's A Blog Party: Delicious Dishes
*2 Maids a Milking: 2 Maids a Baking
*Inside BruCrew Life: Trick Or Treat Tuesday
*Our Delightful Home: Show Me What You Got
*Mandy's Recipe Box: Totally Tasty Tuesday
*33 Shades of Green: Tasty Tuesday
*Chef in Training: Tuesday Talent Show
*From Mess Hall to Bistro: Made From Scratch Tuesday
*Crazy for Crust: Crazy Sweet Tuesday
*The Chick Cooks: These Chicks Cooked
*Simply Sweet Home: Friday Favorites
*Alli 'n Sons: Sweet Tooth Friday
*Bacon time with the Hungry Hungry Hippo: Anything Goes
*I Heart Naptime: Sundae Scoop
*Simply Klassic Home: Simply Klassic Sunday
*Flamingo Toes: Think Pink Sunday
*Everyday Mom's Meals: Church Supper

reade more... Résuméabuiyad

Recipe: Quick and Healthy Homemade Potato Chips


I recently had surgery and my recovery involved doing as little as possible for four weeks.  Not so easy to do with three active children in the middle of the school year.  My sweet mother volunteered to take care of all of us.  I know it has been a lot of work for her, but the selfish side of me has enjoyed all the pampering and home cooked meals. While searching for some quick and healthy snacks to make for the girls after school treat, she came across this recipe at Eating Well for Microwave Potato Chips.  Chips that are not deep fried and quick to make...yes please!  The original recipe called for Yukon gold or red potatoes, but my mother made hers with sweet potatoes, purple fingerling potatoes and Idaho potatoes.  Not only were they colorful but they were so tasty.
 
I am always looking for ways to make my children's lunches and snacks a bit more healthier and this is a great alternative to processed over chemicaled bagged chips.  

Thanks Mommy for finding such a great healthy recipe.  Enjoy!


Quick and Healthy Homemade Potato Chips
{adapted from the original recipe by Eating Well}
Ingredients
  • 1 1/3 pound potatoes, unpeeled and scrubbed
  • 2 tsp olive oil
  • 1/2 tsp salt

Instructions
  1. Slice potatoes into very thin rounds.
  2. Toss the slices in a medium bowl with olive and salt to coat evenly.
  3. Coat a large micro-wave proof plate with cooking spray. Arrange some potato slices in a single layer on the plate.
  4. Microwave, uncovered, on High until some slices start to brown, about 2 to 3 minutes (depending on the potato thickness and microwave power).
  5. Turn the slices over and continue microwaving until they start to crisp and brown around the edges, another 2 to 4 minutes. Check frequently and rearrange slices as needed to prevent scorching.
  6. Transfer the chips to another plate and allow to cool completely. The chips will crisp more as they cool.
  7. Repeat with remaining slices.
Powered by Recipage

reade more... Résuméabuiyad

Recipe: Heart Shaped Tortilla Chips


One day as I was browsing (really obsessing) on Pinterest for some cute ideas for my kid's lunch on Valentine's Day, I came across these super cute and super easy heart shaped tortilla chips.  Cute...right?!  Better yet, they are not fried and chemicled up, they are baked in the oven.  I can't wait to surprise my girls with these heart chips!


Heart Shaped Tortilla Chips

Ingredients
  • Corn tortillas
  • olive oil
  • kosher salt

Instructions
  1. Preheat oven to 350 degrees.
  2. Lay tortillas out and use a heart shape cookie cutter to cut shapes.
  3. Place on a cookie sheet.
  4. Sprinkle tortillas with salt.
  5. Bake for about 10 minutes or until golden brown and crisp.
Powered by Recipage


Linked To:
reade more... Résuméabuiyad

Recipe: Nutella Swirl Banana Bread


Banana bread is a favorite at our house and this is the only way that I can eat bananas.  Just before Christmas, I bought one of these big bags of very ripe bananas for next to nothing so that I could make some banana bread for our friends and family for Christmas.  I have a recipe that has never let me down...super moist and delicious every time I make it!  I made a few loaves but really wanted to jazz up the next few batches.   Chocolate and banana just seems to go together and I though about adding some chocolate chips to the batter but then I had a light bulb moment....nutella!  I mean, who doesn't love that yummy goodness!  I decided to give it a try and let me tell you it was so good my family devoured the first loaf before it even had a chance to cool down.  It has just enough chocolate yum, but it is not so overly sweet that you can't enjoy the wonderfulness of a slice.  I think it is kind of pretty too!  It was well liked by all my family and friends and my children have already requested it several times.  

Enjoy!


Nutella Swirl Banana Bread
by Wende Rickett/The Rickett Chronicles
Ingredients
  • 1/2 cup butter, room temperature
  • 1 package (8 oz) cream cheese, room temperature
  • 2 cups sugar
  • 2 eggs, room temperature
  • 1 1/2 cups banana (about 4 medium), mashed
  • 1/2 tsp vanilla
  • 3 cups flour
  • 1/2 tsp baking soda
  • 1/2 tsp baking powder
  • 1/2 tsp salt
  • 2/3 nutella, divided

Instructions
  1. Preheat oven to 350 degrees.
  2. Spray a loaf pan with nonstick cooking spray.
  3. Cream butter, cream cheese and sugar in a large bowl until light and fluffy.
  4. Add eggs, one at a time, beating well after each addition.
  5. Add bananas and vanilla, beat well.
  6. In a separate bowl, combine flour, baking soda, baking powder and salt.
  7. Slowly add dry ingredients to wet ingredients mixing until just combined. Do not over mix.
  8. Spoon half the batter into the pan.
  9. With a spoon, dollop 1/3 cup nutella over the entire surface of the batter.
  10. Spoon the rest of the batter into the pan.
  11. Dollop 1/3 cup nutella over the surface of the batter.
  12. With a knife, insert into the batter and gently swirl the batter and the nutella.
  13. Place pan in the oven and bake 1 to 1 1/4 hours or until a toothpick inserted in the middle comes out clean.
  14. Remove from oven to a wire rack and cool about 15 to 20 minutes.
  15. Remove from pan and cool completely.
Powered by Recipage

Linked To:


reade more... Résuméabuiyad

Recipe: Streusel Topped Pumpkin Spice Muffins {Revisited and Updated}


I am in the process of updating the pictures of my older recipes.  While I do not claim to be very good at taking photos, I am trying and learning.  And, let's be honest, anything is better than what they were!

We love all things muffin in our house.  My family loves them for breakfast, with their lunches, snacks...you name it.  These muffins are one of are very favorites (I think I say that about all the muffins I make) especially during the fall months.  When they are baking, not only does my house warm up from the oven, but the most delightfully warm scent fills the air.  These are super easy to make because they require three ingredients for the muffins...spice cake mix, canned pumpkin and water.  You can add the streusel topping, which takes these over the top, or you can leave them "naked."  

The recipe can be found here with newly updated pictures.

Enjoy!


Linked To:
*Alli n Sons: Sweet Tooth Friday
*Six Sister's Stuff: Strut Your Stuff Saturday
*Sweet as Sugar Cookies: Sweets for a Saturday 
*Be Different, Act Normal: Show and Tell Saturday
*A Well Seasoned Life: Sweet Indulgences Sunday 
*LambAround: Not Baad Sundays 
*Nifty Thrifty Things: Nifty Thrifty Sunday 
*J&M's Eye Candy: Strut Your Stuff Sunday 
*Flamingo Toes: Think Pink Sundays 
*Petite Hermine: Sunday Linky Party
*My Sweet and Savory: Meatless Monday
*Boogieboard Cottage: Masterpiece Monday
*11th Heaven's Homemaking Haven: Homemaker Monday
*Frugal Antics of a Harried Homemaker: Your Recipe, My Kitchen
*Talking Dollar and Cents: Muffin Monday 
*DIY Home Sweet Home: More the Merrier 
*Make Ahead Meals for Busy Moms: Melt in Your Mouth Monday
*Delightfully Dowling: Mangia Monday
*A Southern Fairytale: Mouthwatering Monday 
*Marvelously Messy: A Marvelous Mess  
*The Girl Creative: Just Something I Whipped Up


reade more... Résuméabuiyad

Recipe: Cinnamon Biscuit Balls


With three busy girls and a busy family life, I am always looking for quick recipes that I can make to change up our snacks and breakfasts.  My girls love to eat muffins and biscuits so I when I came across this recipe on Karly's blog, Buns in My Oven, I thought it would be a great alternative...and it was!  Not only was it delicious but it was super easy to make because it is made with a baking mix and only required a few ingredients.  My girls loved them and I was happy to have a homemade treat to put in their lunches.  Next time I make them, I will try dipping them in caramel sauce as Karly suggests.

Enjoy!

Cinnamon Biscuit Balls
(original recipe by Karly/Buns in My Oven)
{print}

Ingredients
2 1/3 cups baking mix (ie Biquick)
1/2 cup milk
3 tbsp melted butter
4 tbsp sugar, divided
1 tsp cinnamon

Directions
Preheat oven to 425 degrees.  Mix half of the sugar and the cinnamon in a small bowl.  Mix remaining ingredients together until a soft dough forms.  Scoop dough by tablespoons and roll into a ball.  Roll each ball in the cinnamon-sugar mixture and place on a greased baking sheet.  Bake for 8 to 10 minutes.

NOTE:  You can mix the dough with a mixer, but I mixed mine by hand and found the dough to be really easy to mix.  


Linked To:
*Talking Dollar and Cents: Muffin Monday
*Nifty Thrifty Things: Nifty Thrifty Sunday
*A Well Seasoned Life: Sweet Indulgences Sunday 
*Flamingo Toes: Think Pink Sundays 
*Everyday Mom's Meals: Church Supper 
*Petite Hermine: Sunday Linky Party 
*The DIY Home Sweet Home Project: More the Merrier 
*Make Ahead Meals for Busy Moms: Melt in Your Mouth Monday 
*Delightfully Dowling: Mangia Mondays
*Marvelously Messy: A Marvelous Mess 
*Sumo's Sweet Stuff: Market Yourself Monday 
*33 Shades of Green: Tasty Tuesdays
*Reasons To Skip the Housework: Tuesday Time Out
*Mandy's Recipe Box: Totally Tasty Tuesday
*Permanent Posies: Tuesday Tasty Tidbits 
*It's A Blog Party: Delicious Dishes 
*Blessed With Grace: Tempt My Tummy Tuesday 
*Balancing Beauty &; Bedlam: Tasty Tuesday
*My Sweet and Savory: Let's Do Brunch
*Not So Homemade:  What's Cookin' Wednesday 
*Around My Family Table: Turning the Table Thursday
*Somewhat Simple: Strut Your Stuff
*Something Swanky: Sweet Treats Thursday 
*Talking Dollar and Cents: Sweet Temptations 
*Alli n Son: Sweet Tooth Friday
*Sweet As Sugar Cookies: Sweets for a Saturday
*The Sweet Details: Savory Sunday 
 
reade more... Résuméabuiyad

Recipe: Mandarin Orange Muffins

 
My family loves muffins of all kinds.  One of our favorites is Monkey Muffins.  They are so good and nutritious when made with whole wheat flour.  As much as I love them, I was looking for something new and exciting to try.  I came across this recipe and was intrigued because my kids love mandarin oranges.  These muffins are super easy because they are made with a baking mix.  They are so soft and tender and the cinnamon sugar topping is a nice compliment to the oranges.  My kids and their friends devoured them in no time flat, especially my Abby.  She has asked me to make them again almost every day now.  They are her new favorite.  While they are not quite as healthy as our Monkey Muffins, they are very good and I might try to make them with a whole grain baking mix next time.


Enjoy! 

Mandarin Orange Muffins
(original recipe by Talking Dollar and Cents)
{print} 

Muffin
11/2 cups baking mix
1/2 cup sugar
1/2 tsp nutmeg
1/4 tsp allspice
1 egg, beaten
1/3 cup butter, melted
1/2 cup milk
1 11-oz can of mandarin oranges, drained and diced

Topping
1/4 cup butter, melted
1/4 cup sugar
1/2 tsp cinnamon

Directions
Preheat oven to 350 degrees.  Coat muffin tins with non-stick spray.  To make the batter:  Combine baking mix, sugar, nutmeg and allspice in a large bowl.  In another smaller bowl, stir egg, butter, milk and mandarin oranges together. Stir the liquid ingredients into dry ingredients until just mixed.  Over mixing the batter will result in a tougher muffin.  Spoon batter into muffin tins filling each tin 3/4 full and making sure orange bits are evenly distributed.  Bake for 20-25 minutes.  To make the topping: Combine sugar and cinnamon in small bowl.  While muffins are still warm, brush the tops with the melted butter butter and sprinkle the sugar-cinnamon mixture across the top of the muffins.

reade more... Résuméabuiyad

Recipe: Chicken and Gnocchi Soup


Yum....soup!  Who doesn't love a big bowl of yummy good soup on a cold winter's night?  Especially one that is filled with gnocchi and creamy goodness!

I have seen several different versions of this recipe floating around.  I played around with a couple of them and this is my version of heaven in a bowl.  Serve with warm crusty bread and prepare thine self for the warmth that is about to ensue.  I had just a little bit leftover and put it in my girls lunch the next day and they were happy children and I am THE best mom, at least for the next 2 hours.

Enjoy!

 
Chicken and Gnocchi Soup

4 tbsp butter
1 tbsp olive oil
1 medium onion, finely diced
1 cup celery, finely diced
2 garlic cloves, finely grated
4 tbsp flour
1 cup heavy cream
3 cups whole milk
1 1/2 cups carrots, finely shredded
3 chicken breasts, cooked and diced
1 tsp chicken base (or use 1-14 oz can chicken broth and omit the water)
2 cups water (I used the water that I cooked the gnocchi in)
1 lb gnocchi
1 bag baby spinach, coarsely chopped
Salt to taste
Grated Parmesan cheese

Cook the gnocchi according to the package directions.  Drain and set aside, reserving the cooking water.  Saute the onion and celery in the butter and olive oil.  When the onion becomes translucent, add the garlic and cook for about 30 seconds.  Add the flour  to make a roux.  Let the butter and flour mixture cook for about one minute.  Add the cream and milk mixing well.  Add the carrots and chicken.  Once the mixture becomes thick, add the chicken base and reserved cooking water or chicken broth.  Once the mixture thickens again, add the cooked gnocchi, spinach and salt to taste.  Serve with grated Parmesan on top.

Print

Linked To:
reade more... Résuméabuiyad

Recipe Review: Macaroni and Cheese Cupcakes


I know right?  Macaroni and cheese cupcakes?  Really??  Really!  And they are awesome.  While mac and cheese has been a kid favorite forever, mixing it up a bit and turning it into something new and different is a great idea.  I would have never thought to put mac and cheese in a muffin tin to make these awesome little treats.  (But this does get the mind going on what else you can create...)  While these are not "cupcakes" they are a fun way to eat something that has been around since forever. 

Two out of three of my kids liked them but I bet I can convince that reluctant one to give these another chance.  And I will be trying these out in their lunch boxes very soon.  I will also be making these when we have the entire family here for the holidays and we are looking for ways to feed a bunch of kids lunch.

Enjoy!

Macaroni and Cheese Cupcakes
Recipe from Framed Cooks

8 ozs elbow macaroni (I used a box of mac and cheese)
2 cups shredded cheddar cheese, plus extra for garnish
2 eggs
1 cups milk
salt and pepper

Preheat oven to 400 degrees.  Line or spray very well a 12 cup muffin tin.  Cook the macaroni until done.  Drain and immediately return to pot.  Add cheese and stir briefly until almost melting.  Beat eggs into milk and then pour mixture into macaroni making sure not to cook the eggs.  Mix very well.  Ladle macaroni mixture into tins and bake for 15 to 20 minutes.  Cool slightly before serving.

Print

reade more... Résuméabuiyad

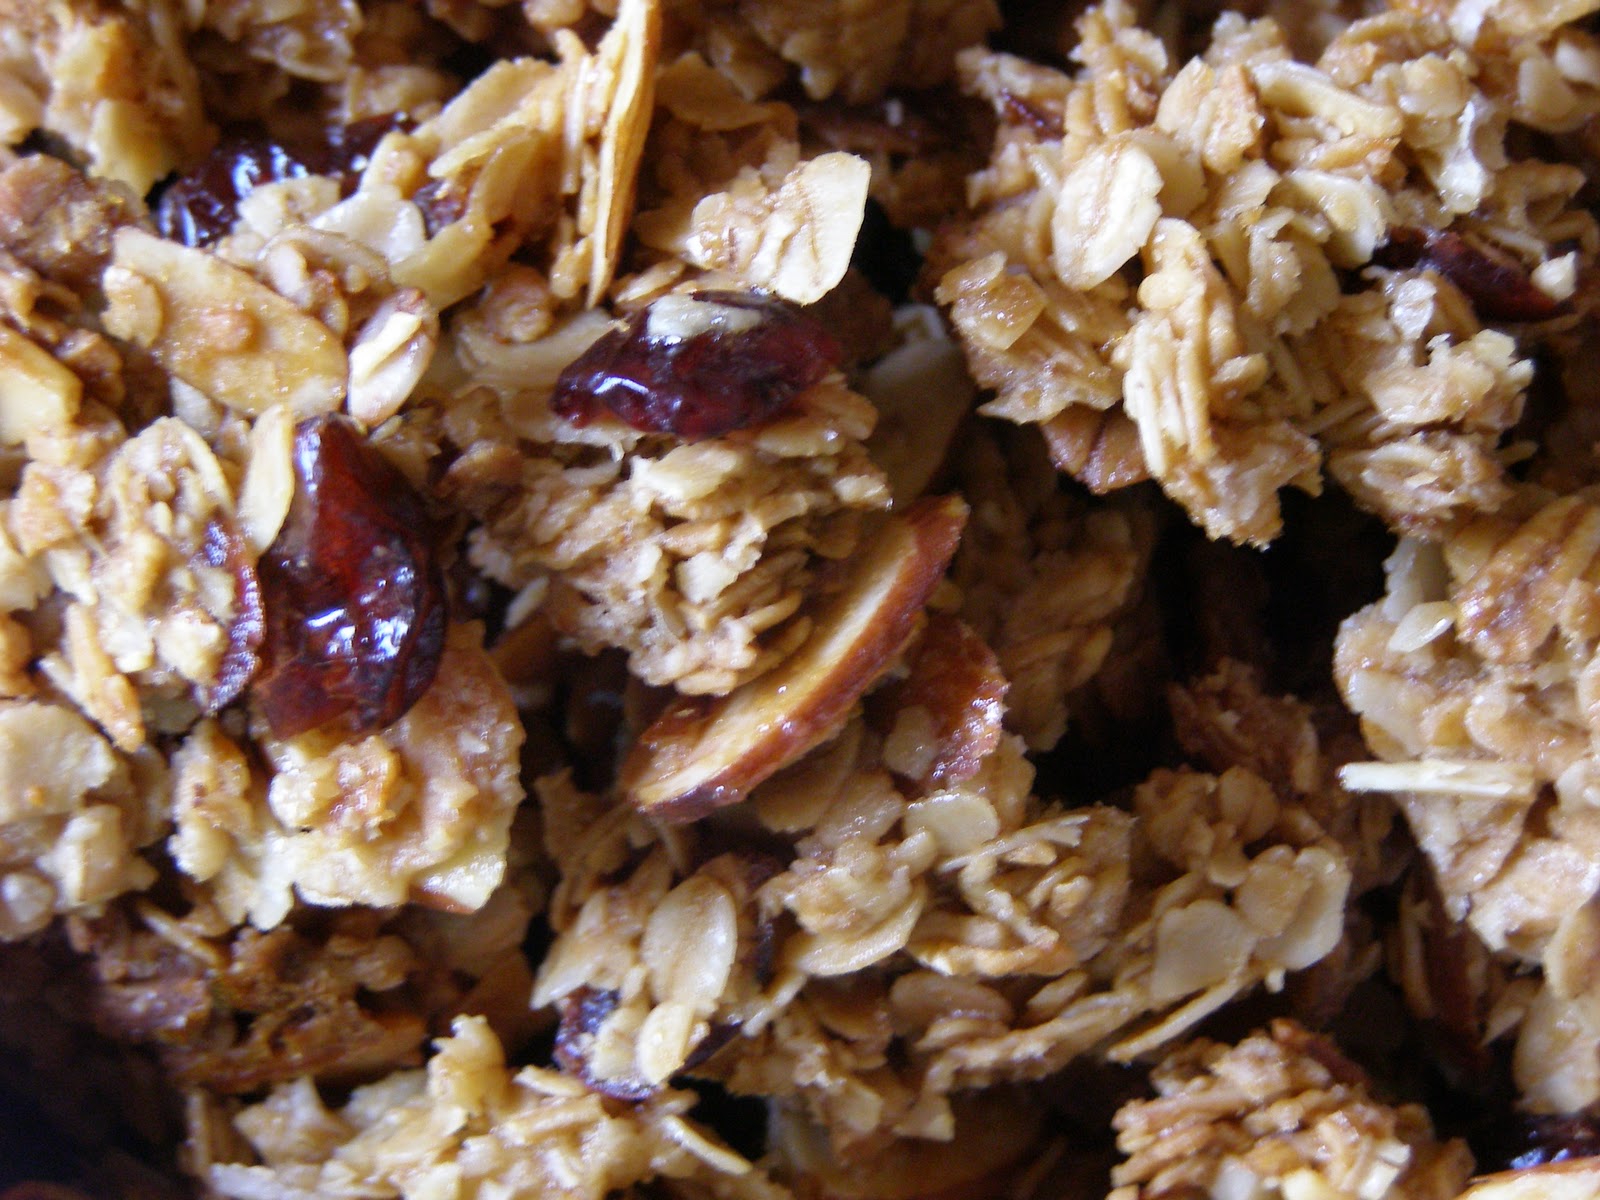
Recipe Review: Elise's Homemade Vanilla Granola


In an effort to feed my family more healthy less processed foods, I decided to give this granola recipe a shot.  I love granola.  I love it with milk in the morning but I especially love it by the hand full...:>)!  This recipe is OMG awesome!!  It smelled so wonderful as it was baking away in the oven.  So good that I couldn't wait for a taste as soon as I pulled it out of the oven.  It was delightful!  I only made one change to the original recipe.  I omitted the wheat germ because I did not have any. 

I now have a full gallon zipper bag of the most delicious granola at my eating whim.  My girls have a healthy snack without the added preservatives and chemicals.  You MUST give this a try if you heart granola. 

Enjoy!


Elise's Homemade Vanilla Granola
(recipe from Favorite Family Recipes)

8 c. oats
2 c. sliced almonds
1 c. wheat germ
1 c. brown sugar
1 tsp. salt
1 tsp cinnamon
craisins or raisins, to taste (optional)
3/4 c. canola oil
1 c. honey
3 Tbsp. vanilla

Preheat oven to 300 degrees. Combine first 8 ingredients (dry ingredients) in a large bowl. In a saucepan combine oil, honey, and vanilla and bring to a boil. Let boil for 1 minute then pour over oat mixture. Mix until all ingredients are moistened. Divide and spread mixture over 2 large cookie sheets and bake at 300-degrees for 20-30 minutes. Remove from oven and leave on pans until the granola hardens.  Break up granola and store in large Ziploc bags or containers.

Print

Linked To:
  * Prairie Story:  Recipe Swap Thursday
  * Gnowfglins:  Tuesday Twister
  * Simply Sweet Home:  Friday Favorites
reade more... Résuméabuiyad